Thursday, October 29, 2009

Tomorrow is the....

big day! Halloween! My kids are all ready to go trick-or-treating! They all enjoyed their parties at school and were ready for a day off!

Before we get to the sketches I wanted to show you another great project from PJ.
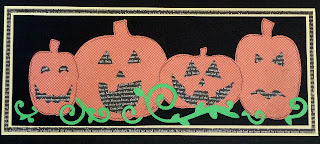
PJ made this border by layering pumpkins she cut with the Spellbound Slice Design Card. This would be easy to make with the Spellbinders Pumpkins too! Wouldn't this look great along the bottom of a Halloween layout?

Now, to refresh everyone's memory let's take a look at last week's sketch.
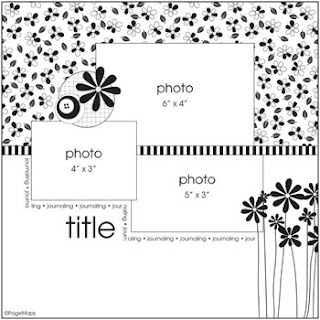
I found this sketch on Page Maps.

Our friend Karin let this sketch inspire her to create this cute and spooky layout...
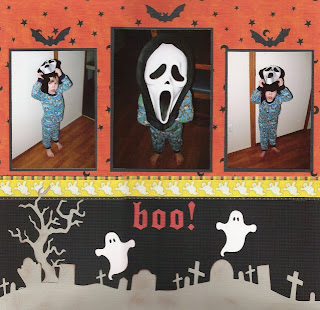
Karin used the Graveyard border along the bottom of her layout and added some 2x2 Bats and Ghosts and the tree from the Haunted House with Tree cookie cutter die set. She used the spooktacular Haunted alphabet for her title. I love how the middle photo makes the mask look so much larger than his little body!

Jannie also took on the sketch last week. Check out her layout...
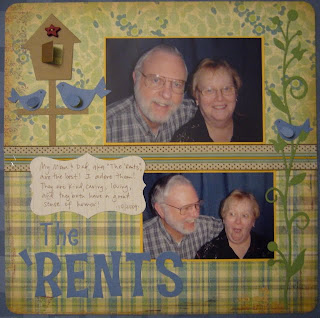
Jannie opted to add a journal block in place of one of the photo spots. She mixed the Strawberry and Teriyaki fonts for her title. She also added the Revolution and 2x2 Bird, Vine border and and Nesting Labels. This is one die-packed layout!

Shar's layout is one subject I dread when I think of my daughter!!!
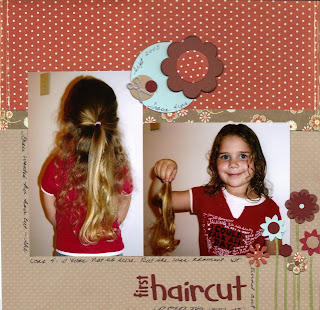
Just look at that ponytail! Shar used the Paperdoll and Studio Skinnimini fonts for her title. She added the Nesting Circles, 3-d Flowers, Cookie Cutter Flower Shapes, Scissors from the Cookie Cutter School shapes and the Revolution Sunflowers. Gracie's just as cute with shorter hair, I think!

Okay, so are you ready for this week's sketch?
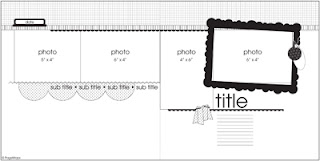
This is another great Page Maps sketch.

I really liked this sketch and decided to make my layout as close as I could get to it.

I topped my pictures off with the Bead Border and framed one of the photos with the Spellbinders Polka Dot Frame. I mixed Moonlight and Flirt fonts to create my title. The little hearts also came from the Flirt gift set and I added one of the Revolution Birds. The cardstock used for the frame, birds and hearts is Core'dinations and after cutting it I lightly sanded it. I really haven't been much into two-page layouts but I do really like how this one turned out!

Well, we hope you've found some inspiration here today. When working with a sketch, even if your layout doesn't look exactly like the sketch, or anything like the sketch, that's totally okay! The sketch is simply a starting point for inspiration. It could be the number or arrangement of photos, the colors in the sample or the actual shapes used in the sketch that inspires you. If you'd like to share your projects based on any of our sketches, even past ones, you can email them to me at katie@scrap-mart.com. Enjoy your weekend and have a safe and Happy Halloween!

Katie

Wednesday, October 28, 2009

Mr. Brown delivered....

a large box to me yesterday all the way from Lindon, UT. And Jenn got one too. And the store, but theirs was MUCH bigger. What is it you ask? Well, it is none other than next week's Quickutz release!!! Yep! They're here and as soon as you see them you'll want them and we'll be able to get them right out to you. Okay, okay, enough teasing. But, we really do have the dies!

Perhaps yesterday's delivery is why I forgot today was Wednesday! I know, that's really bad. But really, I lost a day somewhere. It's okay though becuase the projects I have to show you will totally make you forget that I was late today! (blush)

We'll start with these awesome Halloween Decor ideas from Shar.

For this project, Shar dropped some candy corn down into a cup then she cut out shapes, adhered them to skewers and stuck them down into the candy! A quick tie of a ribbon around the top of the cup and you have yourself an edible Halloween centerpiece! Shar used the Cookie Cutter Haunted House and Tree (for the tree), the other Haunted House (for the moon, clouds and bat), the Revolution Bat, 2x2 Pumpkins and Ghost.

Now this next idea from Shar is great for those of you who don't like to get your hands dirty carving pumpkins. Or for those of you who have little ones who don't need to play with sharp objects! LOL!

Here Shar used her dies to cut black Quickutz vinyl which she adhered to the pumpkins in lieu of carving them. This is especially great because like Shar said, the pumpkins will last longer not carved and the vinyl is basically weather proof! She used the Haunted House with Tree again and the Halloween border on one. For the other she used the other Haunted House set for the moon, clouds and bats then she used basic shapes to make a face for the smallest pumpkin. Her granddaughter, Grace, helped her make these.

Here's a great treat bag idea from PJ.

To make this cute little guy, PJ used the largest die from the Spellbinders Labels 1 Nestabilities set, a Scallop Circle Nestabilities and 2 regular Circle Nestabilities. For the beak, she cut a Square Nestabilities and cut it into quarters from the corners to make the triangle. These little bags are adorable and could be easy to mass produce.

And here's one more Halloween themed quickie project and a note from Jenn.

Looking for a last mintute teacher's gift? Stop by the drugstore and pick
up a bag of peppermint patties, then grab your QK Nesting Flowers or Spellbinders Scalloped Circle Nestabilities, some black cardstock and a Photo Corner die and voila - instant spiders! I just added some googly eyes and a circle nose for the finishing touch. I've seen this idea on several blogs using punches so I'm not sure where it originated (possibly a Stampin UP rep), but it makes for a quick and easy halloween project. If you don't have a photo corner die, you could use the lightning bolt from the Rev Weather die, or a #7 from many different alphabets. Wouldn't these be great using the chubby animals you can cut on your Silhouette? Or how about the new Quickutz Turkey released last month - the body is a circle and the feathers could go behind. I'm sure you can think of many adaptations for this idea.

Aren't those some fabulous ideas? If you make any variation of these ideas I hope you'll share with us! You can email your projects to me at Katie@scrap-mart.com. We'll be back on Friday with some sketchy fun! We hope to see you then!

Katie

Monday, October 26, 2009

We had a birthday to celebrate...

this last weekend. Actually, make that two birthdays. My husband and father-in-law share the same birthday. I opted to make a non-traditional cake for them this year. They both LOVE Oreo cookies so I made an Oreo Dirt Cake. Super easy and oh so delicious. I hid gummie worms throughout the cake and topped it with a Chocolate-covered Strawberry "garden". Then I busted out my dies for the topper.

I used the Happy Birthday and the Revolution Pop-up Flower. Glue dots are holding the die cuts to the skewers. My husband and kids topped it off with a few more gummie worms! The cake was yummy and I saved the die cuts for his scrapbook page!

Check out Jenn's adorable layout with the new Quickutz Dolls...

Jenn's background paper is from the Scenic Route Garden Grove collection. She used the new Paper Doll Body and Firefighter Outfit and instead of cutting the face she used a Sizzix Doll rub-on face...it fits perfectly! She used the Sizzix Blocky Bunch font for her title. The layered title is great added detail! Jenn also added the retired Quickutz Fire Hydrant and retired Sizzix Grass.

Now, since Halloween is this week we're going to have some fun projects you can make, even last minute! Our friend, PJ sent me the cutest projects. Here's her message...

Happy Haunting!!! I used the three Nestabilities shown below by
Spellbinders to create this spooky cute Frankenstein.

The mouth was stitched with floss. I cut 2 large labels one in green and one in black and trimmed the black to make it look like hair. The eyelids and nose are circles cut in half and mounted with foam tape. I used the new Triart Cool Grey marker to add detail to the edges. If you haven't tried the Triart markers, I encourage you to do so. They are everything the Copic markers are and more. They have added a third tip to the pen which is a fine writing tip. It's what I've been waiting for...now you can add your journaling in the same color used on your
images. Totally awesome markers for only $2.99. They blend well with all my Copics I already own as well. Watch for the refills coming soon at Scrap-mart.com.

We'll have some more cute 'n spooky projects for you this week so stay tuned! See you Wednesday!

Katie

Friday, October 23, 2009

Are you feelin' sketchy?

It's Friday and Friday on the Scrap-Mart blog means sketches! We'll start with a refresher of the sketch I posted last week.

I found this sketch on the Scrapbook's Etc. website.

Our friend Jannie completed a layout based on this sketch. The house is the picture may seem like a plain white house to us, but this was the home of Jannie's Grandmother, who held a very special place in Jannie's heart.

Jannie used the Marigold 2x2 Classic alphabet for her title and added the Revolution Heart and a 2x2 Square Petal Flower. I think it's awesome that Jannie was able to scrap a photo that was so important to her! Thanks for sharing with us, Jannie!

Okay, so are you ready for this week's sketch?

This sketch is one from the October Maps section of Page Maps.

Jenn has two boys and doesn't always get to scrapbook girly stuff but she used this week's sketch to document her last birthday celebration.

Jenn used the Hello Kitty Sizzlit, Groovy Girl Decorative Border alphabet, Curly Border, the retired sun and grass. The background paper she used is from a Pink Paislee paper pack she picked up in our Kansas City convention booth.

I kept my layout very simple. I mounted my photos on a simple patterned paper but wanted to keep the attention on the photos themselves.

I used the Marigold 2x2 Classic alphabet for my 'Union Redskins' title. My football player is one of the new BossKut Kids. They are available in die form but I used my Gazelle to cut this one. My brown paper is American Crafts from our booth and the white paper is a grid paper from a Scenic Route paper pack. I journaled the basics about Seth's footbally season on the grid paper stri but I think I'm going to add a hidden journal block with some more details about his season.

If you haven't checked out the store recently you should stop in. We have recently added a new product called Triart Markers. Triart Markers are alcohol based and refillable just like Copics; however, Triart Markers come with 3 nibs instead of just 2. Each marker has a fine tip for writing plus a brush and chisel tip. I have read many reviews of these markers and they have all been good. They are very comparable to Copic and for about half the price. Don't worry, we'll continue to carry the Copic line as well. This just gives you another option! I will grab a few next week when I'm visiting the store a give you a personal review on them. If you've tried them I'd love to hear what you think!

Thanks for stoppin' by today! I hope you have a wonderful weekend and we'll see you back here Monday!

Katie

Wednesday, October 21, 2009

Good morning and....

Happy Wednesday! I hope you're having a fabulous week so far. Wednesday, as most of you know, is known as "With us Wednesday" here on the Scrap-Mart blog. I have some great projects to share with you today that were created by our readers.

First up is this awesome Treat Caddy PJ created.

And here's a view from the top...

There are hundreds of possiblities when it comes to this treat caddy! You could make and stuff it for a Baby Shower, Wedding Shower, Christmas present or even a Birthday present. PJ stuffed it with treats and gave it to her daughter's coach as a thank you gift. I DO have the directions for this treat caddy in a PDF file so if you are interested email me and I'll send it to you. It is super easy to make and I promise you'll really love the finished product!

This next project I'm going to share with you was made by Pink Paislee design team member, Carole.

Carole used the awesome Pink Paislee Twilight collection to create this "boo-tiful" project. She used various sizes of wooden letters for the 'boo' and the ghost was made out of one of their new canvas tags. For the 'welcome', Carole used the Expression Glitter Alphabet in Limeade. You can read more about how she created this project HERE. I just love the wiggly eyes poking out from behind! We carry Pink Paislee products in our convention booths so

I believe I promised to share another project with you from Eva today as well. Remember, Eva is a guest designer for Unity Stamps this month and she has been kind enough to share some projects with us as well. This project doesn't use any Unity but it does showcase Spellbinders Nestabilities.

Eva created this card by folding her piece of background cardstock before cutting it and placing the die so the cutting edge of one side extended just beyond the fold. That way, when it passed through the machine only 3 edges were actually cut leaving the folded edge in tact, therefore, creating her card base. Eva used the Curved Rectangle Megabilities to make her card base. Then cut two more of those shapes to use as mats on the front of the card. Isn't it pretty? I'm thinking this would make a great Christmas card! Here's a video Jenn did a while back to show you how easy it is to die cut on the fold.


Thanks so much for stoppin' by today! I hope you've enjoyd the projects we shared. We will be back on Friday with reader layouts from last week's sketch and an all new Friday sketch. Enjoy what's left of your week and we'll see you then!

Katie

Monday, October 19, 2009

Who Loves Quick Quotes?

I do! I told you guys on Friday that I was attending the Quick Quotes Private Reserve here in Tulsa over the weekend. After reading an email from a reader friend I realized that not everyone knows about Quick Quotes. So, I'm gonna fill you in!

Quick Quotes specializes in just that, quotes. They have an amazing array of vellum quotes to help you get journaling on your pages! Their quotes come an a million different sizes and just about any theme you could think of! Quick Quotes also has their own paper line and some stunning canvas projects! One of my favorites in thier product line is the Powder Puff Chalking Inks. These inks are outstanding! You can buy them individually or in the pack of 12. I use mine alot to ink up the edges of my die cuts! You can find Quick Quotes at just about every scrapbook convention!

The Private Reserve is like a mini retreat. Friday night was the kick off crop and classes began at 8 am Saturday morning. We had, I think around 10 classes plus on Sunday we completed a 20 page 12x12 album! We were busy little scrappers! Now I can go back and add and embellish my projects with my favorite die cuts (using the leftovers from each kit) and add my pics and I'm done! It was a blast! Now there's only two Private Reserves left for this year BUT they are already setting dates for next year! They do know that they will be in Dallas instead of Tulsa next year! Yeah! Be sure to check out their website to find a location near you...www.quickquotesinstantjournaling.com

Here are a few pictures from this weekend's event...

This was the sign leading into the classroom. Oh, and we had the same room ALL weekend, unlike at regular conventions so we picked a spot and never had to move!
This is co-founder, Patsy Gaut who gave the most beautiful inspirational speech Saturday evening!

This is table one of the Grand Prizes!!!

And this is table 2!!! These are just a few as they also gave away gift certificates and extra kits!
This was our group pic that we took just before we left! There was about 94 of us!
And this is me with the Quick Quotes gals! Michelle, in the black/pink shirt, teaches at the Private Reserves and also at the conventions. She is an awesome instructor! Sunny is on the left of Michelle and Stacey and Patsy are to the right of me. Quick Quotes is a family ran company and they love doing it! They are not just another scrapbook company either! They are friends! Each and every one of them are the sweetest and nicest people and they truly love what they do! I met this group by working at Scrap-Mart and I'm so glad that I know them!

Here is a layout I made (that I think I've already showed you) where I added one of their quotes to my page.

In addition to the quote I used my Slice with the Sports design card, and Moonlight and Chick-a-Dee 4x8 alphabets. Now you see how easy it is to incorporate their vellum quotes into your style of projects!

Before I leave you today I want to share one more thing with you. Quick Quotes has partnered with the American Soldier Card Ministry. At each of their events they offer free card make-n-takes. One is for you to keep and the other is sent to soldiers abroad.

This photo shows the cards that are ready to be sent to the soldiers! I would like to ask everyone to think about participate in sending card(s) to soldiers! I know there are many programs out there like this so you could send to these ladies, Cards for Heroes or even give them to your local Blue Star Mothers chapter. Whatever you do, just please send a card! We all have scraps laying around and you could make a simple card in just minutes. Debbie said something this weekend that really made sense..."There are no Hallmarks in the desert!" Wow! They send their cards in lots of 200 and they need cards to give the soldiers as thank you's as well as cards the soldiers can send back home to their families! Even if you only sent one card, it could mean that box of cards gets sent one day sooner! If you are interested in participating with this group you can send your finished card with envelope to:

TWC Scrappin' Angels
Debbie Gregory
9914 Enchanted Stone Dr.
Houston, TX 77070

Oh, and I also ran into a few Scrap-Mart friends while I was there too! Kristi and her mom LOVE to visit us in the booth and Tess is a new SM blog reader! Thanks to each of your for your continued support! We really enjoy what we do and we could't do it without you! I hope you all had a fabulous weekend and that today is the start of a great week for you! Thanks for stoppin' by today. We'll be back on Wednesday with some gorgeous projects from our guest, Eva as well as more Halloween projects from our friend PJ. Hope we see you then!

Katie

Friday, October 16, 2009

Happy Friday!

Before I sat down this morning to type this post I HAD to pour myself a cup of coffee. I'm a coffee junkie! Probably not as bad as some out there but I do have at least one cup every morning. So, I'm curious. How many of our readers out there LOVE their coffee too? I know, totally off the subject...nothing to do with our Friday sketch. Perhaps my rambling means I'm not quite awake yet.

Okay now, on to projects. Do you remember last week's sketch?

I found this sketch online at Scrapbook's Etc.

Last weekend was our friend Jannie's wedding anniversary! She used this sketch to create a layout with pictures that had special meaning to them.

Some of the papers Jannie used on her layout are the same as she used in their wedding album. Also, she had found right around the time they were married in an antique store. She used both Mary Jane and Marigold alphabets for her title and added the Quickutz Nesting Squares (which she rounded with her Corner Chomper). I love how she incorporated so many items that take her back to the beginning! Thanks for sharing with us and I hope you had a fabulous anniversary!

Now check out what Shar did with the sketch...

I'm almost embarrased to admit it but I have never thought to cut the presents out of patterned paper! Seriously! LOL! I really like how Shar journaled around the edge of the layout! She used Quickutz Nesting Balloons and Stars, and the number 9 candle. She also added in the new 2x2 present, the paperclip and the new, and fabulous, Paper Doll alphabet. Shar, you've single-handedly convinced me I NEED that Paper Doll alphabet!

And how 'bout a peek at this week's sketch?

This week's sketch also comes to us from Scrapbook's Etc.

Jenn used this sketch to get her layout ready for her Halloween pictures! Now all she has to do is drop them into her layout and journal and she's done!

Jenn used her Silhouette to cut the title using a free blackletter font called "ManuskriptGotisch", which is similar to Haunted. She also added the scrolly-flourish border. What a great way to get even more scrappin' done!

And here's my layout...

I used my Gazelle and one of the frame shapes that came with the program to cut the red background. The patterned paper is a mix from Sassafras Lass Monstrosity (black) and Bungle Jungle (blue and cardsock sticker) lines. I used Scenic Route chipboard letters for my title and the stars were stamped from Unity's Let's Get Scrappy Kit.

So do you have any special plans for the weekend? I'm attending a Quick Quotes Private Reserve here in Tulsa. I'm super excited that the've expanded their retreats and can't wait to go. Tonight is the kick off crop so I'm hoping to get lots done! Tomorrow at 8 am classes begin! Whatever your plans are for the weekend I hope you have a wonderful time! It looks like the weather may clear up here and we may even have a bit of sunshine for the weekend. We'll be back on Monday with some more fabulous projects! See you then!

Katie

Wednesday, October 14, 2009

With us Wednesday

You know, the best part about my job, if you want to call it that, is sharing! I love to be able to share projects and ideas and hopefully help to inspire you all in some way. A few months back I posted this...

my April calendar page. When Seth was a baby I ALWAYS sang him the sunshine song. To this day, even though he's almost 10, he will ask me to sing it to him. I LOVE it! After posting this I received an email from our friend Karin Brown explaining that the sunshine song was also very special to her and her son. My page inspired Karin to do a layout about her son with that song in mind. Here's her layout...

Karin adorned the bottom of her page with the Cookie Cutter Rainbow then added her journaling underneath it. She used the retired Sunshine alphabet for her title, added some music notes and clouds from the Cookie Cutter Weather shapes. Thank you, Karin for sharing your layout with us!

Now check out this layout from our friend Shar...

When I saw this layout I couldn't help but giggle. I mean, look at that serious face!! That is Shar's son, Jeffery and she says he still makes that face at 15! LOL! Shar used the Scallop Journal Rectangle and the new Paper Doll 4x8 alphabet. Shar, thanks for sharing your layout with us! Hopefully, Jeffery doesn't read our blog! LOL!

The last project I have to share with you today is from our friend, PJ.

PJ used her Slice and the new Spook Alley +ms design card. The +ms means that design card has the mirror and shadow features. The mirror function is great for embossing backgrounds like PJ did on this card. You simply turn your cardstock face down on your embossing pad, pop your embossing tips into your Slice choose your design and the machine does all the work. This card would also make a great invitation to a Halloween party!

See why I like my job so much?! All this sharing! I know one of you today will be inspired by one of these projects! My layout had a special meaning to me and by sharing it, someone else was inspired to document something they had not previously thought to put in writing. That's the wonderful thing about our hobby. We're telling a story, and not just any story, our LIFE story! We're inspiring others to do the same. This hobby has grown soooo much in the 9 years I've been in it. Thanks to all of our readers who take the time to stop by and for all of you who share and help to inspire others. And, if you haven't shared yet but would like to you can email your projects to me at katie@scrap-mart.com. I hope you're all having a great week! We'll be back here for Friday sketches and we hope you'll join us!

Katie

Monday, October 12, 2009

Wow! What a weekend!

Two shows in two states and a blog hop. A huge thanks to all of you who stopped by one of the booths to say hi and shop. We appreciate you! And, how 'bout that blog hop? Did you see all those amazing projects? The Unity DT did a fabulous job showcasing the new October Retailer KOTM. This month's Unity Guest DT member is Eva. I have seen her beautiful creations on Paperee. Check out the project she created for the blog hop...

Isn't that gorgeous?! You can visit her BLOG to see more of her creations and to read the directions on how she created this card. If you haven't had a chance to visit the hop, I strongly urge you to check it out. It was soooo inpsiring!

Veronica is really enjoying the new Print and Cut files Quickutz has available in their deisgn store for the Silhouette. Check out this layout she made...

For her title, Veronica used the Studio alphabet. There's a bit of a story behind her title too. Her son, Viggo, starts every sentence with "Hello, lock at me..." so Veronica made that the title of her page! LOL! Kids say the darndest things.

The next project I have to share with you today is from Tammy. Her son actually helped her put this layout together.

They used the Unity Stamps Plaid Journal Block and the ampersand from the Banana Split font. I think it's so awesome when our kids get involved with scrappin' too! My 9 year old has expressed more of an interest lately.

Tonight, my son Seth and I are headed to the Miley Cyrus concert with some friends! Wish me luck!!! LOL! I'm ready to take some great pics so I'm sure I'll have some rockin' layouts to share soon!

I love reading emails from our readers! It is so nice to get to know you and chat with you. I just wanted to say thanks to all of you who take the time to drop me a line. You are all appreciated! And, even if you have feedback or a suggestion you may feel is not quite positive I still want to hear from you! We are here for you! If there's something you want to see or know about please don't hesitate to ask! If I don't know the answer I will find it for you! Thanks for stoppin' by! Have an awesome week and we'll see you right back here for With us Wednesday!

Katie

Friday, October 9, 2009

TGIF!! Some of us...

are recovering from all the excitement this week while others are attending conventions! Scrap-Mart is all over the map this weekend. We have one convention in Kansas City, MO and another in Ontario, CA. If you're attending either one of these shows be sure to stop by the booth and check out all the awesome deals and be sure to say hi!

If you're NOT attending one of the shows this weekend, like me, then sit back and relax and take another peek at last week's sketch.

This sketch came from Scrapbook's Etc.

Our friend Jannie was inspired by the sketch and here's her layout...
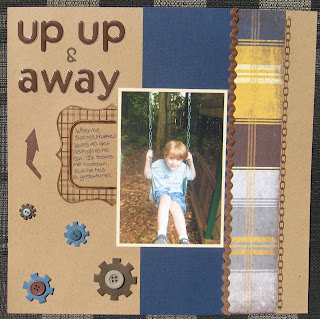
Jannie used the Quickutz Monogram U and S and after cutting them she ran them through a crimper to give them that awesome texture. When she applied them to the layout, she used pop dots to give them added dimension! I love all the journal strips above the photo!

This week's sketch is an October sketch from Page Maps.


I don't usually make layouts with this many photos on it so it was a challenge for me. I pretty much stuck to the sketch...

I used Spellbinders Labels One Nestabilities, Rock Star alphabet, Revolution Candles and one of the purses from the Flirt gift set. If you look closely at the flames on the candles and the latch on the purse you'll see lots of shimmer. After I cut them and put them together I colored them with the new Copic Spica Glitter Pens. The new colors are great and there's even a clear one that just adds sparkle with no color!

This next project I'm going to share with you isn't sketch related but it is sooooo stinkin' cute I just HAD to show you! I was perusing the Spellbinders blog and found this...

Isn't this awesome?! This project comes from Eli over at Spellbinders. She used the limited edition Nesting Pumpkins and the Harvest Borderabilities Petite. Don't you LOVE how she made her pumpkins into Candy Corn?! You can read Eli's entire post complete with step-by-step directions on how to complete this project on the Spellbinder's Blog.

We're sure glad you stopped by today! Hopefully, it's dry wherever you are...it's been raining here ALL DAY! That's okay, perfect scrappin' weather, right?! Don't forget to check out the Unity Stampin' Store Kit Blog Hop that begins tomorrow! I promise you won't be disappointed! I hope you have a wonderful weekend and we'll see you back here Monday!

Katie