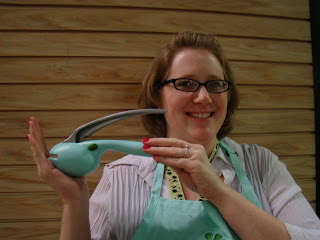
Congratulations to Yaritza! Please email me your address to Katie@scrap-mart.com so I can send you your tote! Thanks to everyone for playing along! Stay tuned because I brought back lots of goodies from CHA and I'll be doing random giveaways for a while!
While Ms. Laura and I were gone the DT kept on working. They've taken a liking to the Quickutz Pennant dies.
On this layout, Tammy used the Square Pennant and the Chemistry font to create her title! Tammy also used the Nesting balloons and some delicious Scenic Route Surprise patterned papers.
Veronica also used the Quickutz Pennants to create a title for her page.
Veronica chose a combination of all three of the 2x2 Pennants. Veronica used the gorgeous Sassafras Lass patterned papers. Notice the rainbow border? Veronica cut the rainbows from the paper apart and placed them along her layout to create a unique border. She also used the Nesting Balloons and she layered them and grouped some buttons around them. Here's a closeup:
Veronica added the number 2 candle to finish off her cute layout!
Now, check out these innovations from Crafty Deb!
She created the baskets using the Quickutz Revolution Cupcake die! The apples in the brown basket are from the Quickutz Cookie Cutter School collection. For the hot air balloon she used the Quickutz Nesting Balloons. Crafty Deb created her baby in the basket by coloring cheeks and eyes on a circle but she thinks the new Boss Kut baby would look adorable in the basket too!
So, what do you think? Do you have any other ideas for using the Pennants? If so, leave us a comment or better yet, send us a picture of your project! Don't forget about "With us Wednesdays". I have received some really cute projects to show you but there's lots of Wednesdays so we're always looking for more! Send me your thoughts, projects or "just saying hi" emails to katie@scrap-mart.com. We appreciate you, our readers! Thanks for stoppin' by today. We'll be back Monday with some more projects and a new product announcement! Have a Scrappy Weekend!
Katie
Friday, January 30, 2009
Thursday, January 29, 2009
Just wanted to...
thank you all for participating in the Metric Scor-Pal color decision! #4 was the winning choice! I have already emailed Diana with the choice! The winner of the Scor-Pal CHA tote will be announced tomorrow!
Here's a video from Spellbinders at CHA. It's a demo of their new Impressabilities!
I'll see you all back here tomorrow morning! Thanks for stoppin' by!
Katie
Here's a video from Spellbinders at CHA. It's a demo of their new Impressabilities!
I'll see you all back here tomorrow morning! Thanks for stoppin' by!
Katie
Wednesday, January 28, 2009
From this...
to this...
in a matter of hours!!! We left California this morning and arrived home to ice and snow covered everything! It took over a half our for my car to defrost enough that I could use an ice scraper to knock the quarter inch layer of ice off my car! I miss California already!
I want to apologize for not blogging more while we were gone. I mentioned in a previous post that we had some "technical issues." Well, our computer crashed! Yep, completely down. I have soooo many videos and pics to share and we'll get to them all over the next few weeks.
The first thing I want to address is the new Metric Scor-Pal release. That's right, our international friends will now be able to easily enjoy the Scor-Pal as much as we do. Diana Crick, inventor of the Scor-Pal, is trying to finalize the plans so it can be moved through production. They need to decide what color the Metric Scor-Pal will be and we want YOUR help! Here's a color chart:
Diana and the Scor-Pal team have narrowed down their color choices to #4 and #6. Now, we want you to vote. She did tell me that #4 is her favorite and a darker Navy Blue will be the coordinating accent color if that is the chosen one. Leave a comment on THIS post announcing YOUR color choice and I will randomly choose a winner from the comments to win this Scor-Pal CHA tote bag.
I know it doesn't leave much time but Diana has to have the decision made by Thursday morning. The winner of the tote will be announced on this Friday's post.
So, what was your favorite thing released at CHA? I am totally lovin' the new Bungle Jungle collection from Sassafrass Lass. I was fortuante enough to meet the Sassafrass team and hang out in the booth for a while. I snapped TONS of photos there. Their designers have done a wonderful job showcasing their product. Here are a few photos of some of the new Sassafrass collections.
Layout using Bungle Jungle collection:
New Bungle Jungle chipboard embellishments:
New Felties:
Isn't that stuff the cutest?! I can't wait to play with it!
While Ms. Laura and I were gone the Scrap-Mart design team kept on workin'. Jenn created this great layout to document her sons school field trip.
Jenn used the Quickutz Revolution Pennant for her journaling block. Very creative! She also added the Quickutz Squares Border which she used as the road for her Revolution School Bus.
Jenn cut her title using the Venus font. All this was pulled together with some Scenic Route paper. Those Pennants are so versatile and with the selection available you're bound to find the one to fit the job.
Thanks for stoppin' by today! I can't wait to show you more from CHA. I'm pleased to announce that our "With us Wednesday" posts will be a weekly event instead of just monthly so if you want to be featured here on the Scrap-Mart blog, send me pics of your projects to Katie@scrap-mart.com. I know I didn't post it today but we will definately be back with one next Wednesday. We'd love to see your projects and we hope you'll play along. We'll see you back here Friday!
Katie
Monday, January 26, 2009
Good morning...
and thank you all for stoppin' by! I just wanted to drop in before we headed back out to CHA. You all have been asking for an exclusive die and I'm excited to announce IT'S HERE!!! Yep, Scrap-Mart now has an exclusive border die. Take a look at this gorgeous die!
They are in stock and ready to ship! You can get one here. We'll be back later today with more from the floor! See you then!
Katie
They are in stock and ready to ship! You can get one here. We'll be back later today with more from the floor! See you then!
Katie
Sunday, January 25, 2009
WOW!!! What a day!
I have so much to share with you that I don't even know where to begin! There's so much fun stuff coming out! Spellbinders has some fabulous new things coming to you very soon! First there's the new storage system. The binder that holds the dies is expandable and fits in the front side of the tote leaving the back side of the tote available for your machine. The tote and binder are both a faux suede in a dark raspberry color! Just beautiful and so classy!
They also have some great new dies headed our way. In addition to adding to the Nestabilities collection they are releasing some new shapes too. Here you can see the new frames. The Polka Dot frame is my personal favorite!
And, last but definately not least they have an amazing new item called Impressabilities. These are thin sheets of metal (thinner than the dies) that have intricate designs on them. They can be used to dry emboss in the machines like the regular dies, you can ink them and run them through the machine therefore transferring the image to your paper, you can airbrush them with your Copics or use your inks to stencil and lastly you could cut them apart and use them for actual embellishments! They are awesome!
We also spent some time with Quickutz today. In addition to the new release dies and embossing folders they have some new cutting media available. There's cork paper, magnet paper, metallic paper, vellum and chipboard that has double-sided adhesive on it! They come in multi-packs of 4x8 sheets and the number of sheets depends on the media type. Super cool! They've also released a new Silhouette SD. Not only does this machine have new software that allows you to weld fonts and shapes, the machine itself has an SD slot in it. This means you can save some of your images to the SD card and take your new Silhouette SD with you to a crop! Yep, it's now portable!
I'm sorry I wasn't able to post more throughout the day. I had actually planned to have all of this to you much, much sooner. But, unfortunately we've had some unexpected technical issues today and those issues are keeping me from sharing all the great videos I shot today as well. I'm truly sorry! As soon as I get hone we'll get all those videos uploaded for you. In the mean time, I can continue to share some photos. I'll be back tomorrow evening with a more goodies to share. I hope you're enjoying the reveals as much as I am! See you tomorrow and thanks so much for stoppin' by! We appreciate ya!
Katie
Good Morning! Today...
is opening day at CHA! There's so much for you to see and I'll be here off and on throughout the day so make sure you check in often!
I know you're all wondering what Quickutz has in store for you! Check out the new embossing folders!
They are available in 2x2, Border and A2 sizes! Here's a closeup of some samples made with the folders.
Quickutz isn't the only ones with new embossing stuff out! Making Memories now has an embossing tool kit for the Slice! The kit comes with 3 sized tips...small, medium and large. All you do is remove the cutting blade and pop in the embossing tip then operate the machine just as you would if you were cutting! It will emboss or even deboss the image of your choice from ANY of the design cards!!!
You can see the rest of the Quickutz die releases here. The new releases are 3-d pop-up style shapes and they are really cool! In addition to the embossing folders and the shapes, they've released some great new fonts! I hear Quickutz still has a surprise or two to reveal yet so I'll have more from them this afternoon!
That's all for now! I'm off to see Sassafrass, Copic, Spellbinders and American Crafts so I'll be back soon with more pics! We hope you're enjoying the reveals. And remember, if there's something you want to see you can email me at katie@scrap-mart.com and I'll hunt it down for you! See you soon!
Katie
Saturday, January 24, 2009
Ah! We arrived....
in Anaheim, CA late last night. After a nice, relaxing evening we headed out to the Anaheim Convention Center this morning to help our friends at Boss Kut set up their booth. We also attended a Making Memories party and got to see the new releases! All I can say so far is WOW!
Here are a few pics from the Boss Kut booth.
The Boss Kut shapes are already online at Scrap-Mart and available for pre-order. Here's a look at the Joy Ride 2 Teeny shape, the Cloud 2 shape and the Tiny Baby shape on a layout.
Now for the Making Memories releases! They have 12 new Slice Design Cards coming out over the next few months! Here are some pics of the cards:
Travel USA, International Travel and Big Kids:
Studio Essentials, Wedding and Sports:
Calendar, Card Words and Expressions and Just Chillin' Teen:
Fonts, Spring, and Tag Maker:
I'm super excited about these cards...which are also already on the site! The Tag Maker is especially cool! You can cut your shapes to fit into the metal Tag Maker Rims! How cool is that?! And look at the new Tag Maker:
It's Robin's Egg Blue just like the Slice! But if you have the original Tag Maker, don't worry because the new one is the same size so you can use the one you have with the Slice card too! And look at these new Glitter Rims:
They come in a variety of colors and are just gorgeous in real life!
That's all I have to show you today. But, there's lots more to come tomorrow! Thanks so much for stoppin' by! I'll be back in the morning with more! If there's something you would like to see email your requests to me at katie@scrap-mart.com and I'll track it down for you! See you tomorrow!
Katie
Friday, January 23, 2009
Today is the day....
Ms. Laura and I catch our flight to sunny Anaheim, CA! We're headed to CHA to find the latest and greatest in the paper crafting industry! I have a quick post for you today before we head out to the airport.
The first thing I'd like to show you is this great altered lunchbox tin from Tammy.
Tammy, like many of us, struggles with the perfect solution for her die storage. To solve her issues, Tammy turned to a simple lunchbox tin. She decorated the outside of the tin with some pretty papers and her Quickutz Label, Banana Split font, and the ever lovely 12" Bead Border. Tammy has her Revolution dies in order inside. What a great, and pretty idea!
Veronica has more birthdays to celebrate so she created this card for the occasion.
Veronica layered some Sassafrass Lass patterned paper and topped it off with the Quickutz Label and Birthday from the Happy Birthday die. I love how she combined the Dymo label with the die cuts! And, her hand drawn border around her patterned paper strips really adds to the detail!
Jenn is really gearing up for some football! Check out what she created!
Aren't they great?! For the first logo, Jenn used the Quickutz 2x2 Sparkle die and the Studio alphabet. For the border, she used the same Sparkle die but switched it up and used the Diesel font. These would look awesome on a scrapbook page...or even a card!
The last project for today is a scrapbook page from Tammy.
Tammy used some yummy Pink Paislee papers and the Quickutz Label, Scallop border, Damask, and Banana Split font to bring her layout together.
We're glad you joined us today and we hope you'll be back this weekend to catch a glimpse of all the great stuff that will soon be available! If you have any questions, comments or you just want to share your projects with us email them to me at Katie@scrap-mart.com. See you back here soon with some awesome views straight from the show floor!
Katie
Wednesday, January 21, 2009
Today is our first installment of....
"With us Wednesday". This Wednesday, Deb Pielmeier from Schaumberg, IL is sharing a layout with us. Deb is a stay-at-home mom to 5 beautiful girls!!! She is a scrapbooker at heart but also enjoys altering and making cards.
For her layout, Deb used her Making Memories Slice with the Noteworthy Design Card. I love the layers and gems she added around her journaling block! Thanks for sharing with us, Deb, and for being the first for "With us Wednesday!"
Veronica created this cute card for a friend's child who is turning 3.
To create this card, Veronica cut the number 3 candle out of white cardstock and colored it using her Copic marker. This way, she was able to control the shading to get a perfect match! She even added a wick to the flame! She placed that candle on top of some of the Nesting balloons and tied them off with some string. Here's a closeup of the balloons and candle:
Some small scraps of patterned paper layered up and a piece of ribbon tied off and you've got yourself a quick, but cute card!
Crafty Deb has been playing with her birthday dies too. Look at this elegant set of page borders she created:
Crafty Deb couldn't resist that Revolution Cake die! She paired it with the Champagne bottle and glass. Look closely at the Champagne bottle! Do you notice the spray? She used the spray from the cake to create fizz for her drink! How creative!!! Deb topped it off with the Aquarius font for her sentiment. These would make an awesome layout!
There's lots of birthday buzz in the air but DT member Brenda hasn't forgotten it's still winter outside! Look at this adorable card she made using the Quickutz Label!
Isn't he just adorable?! Inspiration for this project came from "ChirpinIsFun" on the Cricut community messageboard. Here's a peek at the inside of the card:
There are a number of ways you could create this card. If you have a Silhouette, you could use the label from the Postcard Portfolio CD and weld your shape together. Now, the Silhouette software doesn't do the welding but you can do it through MS Word and import it. If you have the Making Memories Slice, you could cut a 4" label from the Noteworthy design card and make yours that way. And if you just have the Revolution, you can still make one! Cut your label(s) out to create the front and back of the card and you can use small strips of paper and glue them on the inside as hinges. Any way you cut him he's sure to put a smile on the recepient's face and warm their heart!
Thanks for stoppin' by today! While you're here, drop us a line and tell us what you think of the projects you've seen today! If you'd like to be featured in our "With us Wednesday" posts, email your projects to me at katie@scrap-mart.com. We'll showcase our readers projects on the last Wednesday of every month. It came a bit early this month because of CHA. Speaking of CHA, don't forget to check in all this weekend because Ms. Laura and I are going to be bringing you the pics and videos straight from the show floor! You won't want to miss it! See you Friday!
Katie
Monday, January 19, 2009
I have to tell you....
that so far, I think January's release is one of my favorites. I just love a good celebration and seriously, who could resist cake?! Speaking of cake, look at this cute layout Tammy created to mark her daughter's birthday!
She adorned her layout with a few strips of Scenic Route's Surprise Paper, some photo corners and one awesome cake! Tammy also used January's Banana Split 4x8 alphabet to create her title. Do you see the tag sticking out from behind the photo? I love a little hidden journaling!
Veronica created a layout for her son's first birthday with the Silhouette Balloon Border download.
Veronica used the Quickutz Storybook alphabet and the Spellbinders Nestabilities Star for her title. Here's a closeup view of the star:
Can you see the embossing around the edge of the star? That's part of what makes the Spellbinders dies so great!
Our next layout is also from Tammy. On this one, she used the December release Revolution Flourish, the Jolly font, and the large photo corner.
Cute, cute layout!
Today's final project comes from PJ. She can't get enough of the Quickutz Nesting Balloons...and I can't blame her!
PJ wanted her balloons to stand out so she ran them through her Cuttlebug Embossing Folder and then gently ran her black Copic marker over the embossed area before adhering them to her card front. Such an easy way to add lots of detail...and without it overwhelming the project! So pretty!
Thanks for stoppin' by today! We hope you're gaining useful inspiration from all the wonderful projects. Don't forget to send your submissions for the guest "With us Wednesday" spots to me at katie@scrap-mart.com. While you're here, leave us a comment! We love hearing from you! I'm counting down the days 'til we head to California for CHA. I'm so excited and I can't wait to show you all the great releases! We'll see you back here Wednesday with more DT projects! Have a great day!
Katie
Friday, January 16, 2009
It's finally Friday...
and we're back with some great projects and a video too! Let's start by taking a peek at this beautiful layout from Jenn.
Jenn used the December Double Damask to make her flourish. She simply pieced two cuts together to make it longer. She mixed the Jacqueline and Banana Split fonts and added the Quickutz Bead Border. To top her layout off, Jenn created the clock using the Spellbinders Watch Faces. Great layout!
Now look at this innovation from Brenda.
Brenda created these flowers all with the flame from the Revolution Candles! I love how unique they look!
Now, this card from PJ is just delish!
Pink is my favorite color so when I saw this in my inbox, it was love at first sight. Pink/black is such a classic color combo. You just can't go wrong with it. PJ used the new Revolution Cake die on the card front and the Happy Birthday on the inside for the sentiment. Yummy!
Veronica created this cute, cute layout of her little frog prince.
She used the frog Silhouette download, the Revolution Tab, Revolution Frame (for the circle), and the Bead Border. The title is a mix of Quickutz Storybook and Boss Kut Totally Tall fonts. I'm really diggin' that Totally Tall font...gonna have to get one of those!
Now for today's video!
Thank you, Brenda! We hope that has answered some questions for you. The DT is currently working on more videos and tutorials for you.
Thanks for stoppin' by! Don't forget we're heading out to CHA next week and we'll be bringing you LOTS of info/pics/videos from the show floor. You won't want to miss it! If you have any questions, feedback, or projects you'd like to share email them to me at Katie@scrap-mart.com. We love to hear from you.
Katie
Wednesday, January 14, 2009
In 9 days, 6 hours and 22 minutes...
Ms. Laura and I are leavin' on a jet plane...sorry, I couldn't resist! Where are we going, you ask? CHA Winter 2009 in Anaheim, CA! That's right, we're venturing out in search of all the latest and greatest heading your way from your favorite manufacturers. I'm so excited I just can't wait! Not only will we be blogging from CHA, we'll have some great projects and VIDEOS from the DT to share with you as well.
I was really excited to see the Quickutz Confetti Border die in the January release. I mean, after all, you can use this for ANY type of celebration page or card. Look at this layout from PJ:
That's PJ's daughter who's birthday just happens to be Dec. 25 so PJ was excited to create a layout for her daughter's birthday without a Christmas theme. Look at that balloon bouquet she created and how she cut the border in smaller sections to fit where she wanted it! Those Cookie Cutter Nesting Balloons are just perfect for this layout! Speaking of balloons, look at this adorable card she made:
PJ used her Cuttlebug Embossing folders to add texture to the balloons then she adhered them with dimensional adhesive! The Crown and the Number Candles look great too and to finish it all off, she outlined each shape using the brush end of her black Copic marker. PJ found that the brush end makes it easier to get into all the corners.
Brenda made a great door banner for her daughter with her name on it.
To create this banner, Brenda cut out the 4x4 Revolution Pennants in various colors then she cut her daughters name in coordinating colors using the Bosskut Licorice Stick alphabet. She inked all the edges before she adhered it all then strung it across the door with some string. These Pennants have endless possibilities!
Jenn made this cute card using the Pin the Lips on the Frog Silhouette download.
This frog is soooo cute! Jenn added a quick, witty sentiment and "Get Well Soon" to the inside and that's it! Don't worry, if you don't have a Silhouette you can still get the Frog for the Revolution.
This quarter-size reference of the new Revolution Lanters was made for us by CraftyDeb.
To create the pleats in the shades, CrafbyDeb drew lines with her Gray Copic marker. Don't they look awesome?!
This next layout cracks me up. Not the actual layout itself but the story in the layout.
Tammy's daughter decided to dress up her brother's robot! Isn't that funny? I can totally see my daughter doing something like this to her brother's stuff! LOL! Tammy captured the moment perfectly! She journaled on the new 4x4 Rebolution Label and topped off her layers with the 12" Bead Border.
Veronica has us seeing stars...literally...with her awesome layout!
Veronica used her Spellbinders Star Nestabilities to cut and emboss the stars in various colors then she sprinkled them around her circle border. She used the largest star as her journaling spot. The title says "Melker's First Pair of Glasses!" He looks great in them, doesn't he?!
So much inspiration packed into one space! If you're like me your head is spinning with ideas. My suggestion, grab a notepad and keep it close. When you get ideas or are inspired by a project write your ideas down. I even sketch mine out even though I'm terrible at drawing! But, I have the reference to go back to when I'm ready to create. That's all I have for you today. Thanks for stoppin' by. We appreciate you! We'll see you back here on Friday with some more fabulous projects and who knows, we may even have a video ready for you too! Enjoy the rest of you week. Don't forget to send me your projects so you can join us on "With us Wednesday". Email them to me at Katie@scrap-mart.com. See you later!
Katie
I was really excited to see the Quickutz Confetti Border die in the January release. I mean, after all, you can use this for ANY type of celebration page or card. Look at this layout from PJ:
That's PJ's daughter who's birthday just happens to be Dec. 25 so PJ was excited to create a layout for her daughter's birthday without a Christmas theme. Look at that balloon bouquet she created and how she cut the border in smaller sections to fit where she wanted it! Those Cookie Cutter Nesting Balloons are just perfect for this layout! Speaking of balloons, look at this adorable card she made:
PJ used her Cuttlebug Embossing folders to add texture to the balloons then she adhered them with dimensional adhesive! The Crown and the Number Candles look great too and to finish it all off, she outlined each shape using the brush end of her black Copic marker. PJ found that the brush end makes it easier to get into all the corners.
Brenda made a great door banner for her daughter with her name on it.
To create this banner, Brenda cut out the 4x4 Revolution Pennants in various colors then she cut her daughters name in coordinating colors using the Bosskut Licorice Stick alphabet. She inked all the edges before she adhered it all then strung it across the door with some string. These Pennants have endless possibilities!
Jenn made this cute card using the Pin the Lips on the Frog Silhouette download.
This frog is soooo cute! Jenn added a quick, witty sentiment and "Get Well Soon" to the inside and that's it! Don't worry, if you don't have a Silhouette you can still get the Frog for the Revolution.
This quarter-size reference of the new Revolution Lanters was made for us by CraftyDeb.
To create the pleats in the shades, CrafbyDeb drew lines with her Gray Copic marker. Don't they look awesome?!
This next layout cracks me up. Not the actual layout itself but the story in the layout.
Tammy's daughter decided to dress up her brother's robot! Isn't that funny? I can totally see my daughter doing something like this to her brother's stuff! LOL! Tammy captured the moment perfectly! She journaled on the new 4x4 Rebolution Label and topped off her layers with the 12" Bead Border.
Veronica has us seeing stars...literally...with her awesome layout!
Veronica used her Spellbinders Star Nestabilities to cut and emboss the stars in various colors then she sprinkled them around her circle border. She used the largest star as her journaling spot. The title says "Melker's First Pair of Glasses!" He looks great in them, doesn't he?!
So much inspiration packed into one space! If you're like me your head is spinning with ideas. My suggestion, grab a notepad and keep it close. When you get ideas or are inspired by a project write your ideas down. I even sketch mine out even though I'm terrible at drawing! But, I have the reference to go back to when I'm ready to create. That's all I have for you today. Thanks for stoppin' by. We appreciate you! We'll see you back here on Friday with some more fabulous projects and who knows, we may even have a video ready for you too! Enjoy the rest of you week. Don't forget to send me your projects so you can join us on "With us Wednesday". Email them to me at Katie@scrap-mart.com. See you later!
Katie
Subscribe to:
Posts (Atom)