Thursday, April 30, 2009

It's Thursday and day 4 of our NSD kick off week!

Jenn from our design team is bringing you a fun challenge today!

Get ready for a Gettin’ Funky with Fonts challenge! With my font collecting habit, I need to venture outside the box of simple titles more often. Let’s get those fonts workin’ - mix them up, get funky and get loose with a title!!

So here is the challenge – two simple rules:

Create a project (can be a scrapbook layout, card or other craft) using more than one font for your title.
Bend, twist, angle or otherwise funk-up your title.

Here is my go at it. I used the Quickutz 4x8 Rainbow font for ‘birthday’ and Moxie Skinni Mini for the ‘at Monkey Joe’s’ phrase. Using one of the arches from the Quickutz Cookie Cutter Rainbow die cut in green as a guide, I arched part of my title.

I can’t wait to see what everyone creates!

Remember, you have until Wednesday, May 6th to post your project on your blog or in an online gallery and leave us a comment on THIS post with the link. If you'd prefer you can email your project to Jenn at Jennl@scrap-mart.com. Jenn will randomly choose 2 winners and they'll be announced here on the blog on Friday, May 8th. One winner will receive the Quickutz 4x8 Rainbow alphabet and one winner will receive the Quickutz 4x8 Chocolate alphabet! Have fun! We'll see you back here tomorrow for our final challenge of the week before our full day of challenges on National Scrapbook Day!

Katie

Wednesday, April 29, 2009

Happy Wednesday! It's Day 3...

of our National Scrapbook Day Kick Off challenges! Today, our friend PJ is issuing a Making Memories Slice challenge! All you have to do is create a project...any project...with your Slice! It could be a tag, layout, card, etc but it has to be a NEW project not previously posted anywhere. You can post your finished project in your blog or in an online gallery or email it to me at katie@scrap-mart.com. Enter as many times as you'd like! I will randomly choose the winner(s) who will receive a new Slice Design Card!

Amy created 2 layouts to get us started. On her first layout, PJ uses the Slice Animal Crackers Design Card.

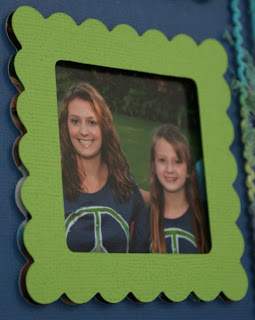
Using her Slice, PJ cut the photo out in a scallop square then the scallop frame which she mounted over the photo with dimensional adhesive. Here's a closeup view...

And a view from the side...

PJ loves the endless possibilities! She often uses this technique to create shaker boxes!

For her second layout she used the new Slice Tag Maker Design Card that will be available soon!

With the new Tag Maker Design Card, you can cut designs that are specifically made to work with the Tag Maker and metal rims. Here, PJ cut a circle tag that she used for small journaling then she put it in a rim and used it as a flower center! There's a million ways you could use these rims! And, Making Memories has released an all new Tag Maker in the Robin's Egg blue that matches the Slice along with some fabulous new Glitter Rims! Yummy! But, don't worry if you have the original tag maker, like me, it will still work with this design card...the only change was in the color!

Okay, now it's your turn! Show us your Slice creations! Don't forget, you have until Wednesday, May 6th so post or email your project and the winner(s) will be announced here on the blog Friday, May 8th. If you post remember to leave a comment on THIS post including the link where you posted it! We sure hope you're enjoying the challenges! We'll see you back here tomorrow for Jenn's challenge...and it's a good one! Thanks for stoppin' by and have a great day!

Katie

Tuesday, April 28, 2009

It's Day 2 of NSD Kick Off Week!

Today's challenge comes from Scrap-Mart Design Team member Veronica!

Veronica is issuing a Bingo Challenge!

Here in Sweden Bingo is a well known and popular game. I’m not personally a big fan of the game but when it comes to Scrap-Bingo I’m in =)

Our second NSD challenge is therefore a Bingo challenge.
You choose one line below (vertical, horizontal or across) and then you use those things for your project. You can add other things but these three things must be used.

You can create a layout, card or altered project – you choose. Post your project on your blog or in an online gallery and link it back here. If you don’t have a blog or gallery, email your project to me at veronicao@scrap-mart.com. You can enter as many times as you want to for this challenge, but all projects must be new. Deadline for entries is Wednesday, May 6th. You get one entry per project, 2 page layouts count as one entry. We will choose the Bingo winners by random and post on Friday, May 8th.

Veronica created a sample layout to get you started.

Veronica used the three buttons, something blue and her "non-scrap" item was patches for children's clothing. For her title, she combined the Quickutz Cookie Cutter Rockstar font and Quickutz Marigold Classic alphabet. She also used the 2x2 Binder Clip, a bracket from the Revolution Brackets and the Revolution Notebook Sheet. What a cute layout!

Okay, so now it's your turn! Remember, you have until Wednesday, May 6th to post your projects on your blog, in an online gallery or email them to veronicao@scrap-mart.com. Veronica will randomly choose 2 winners who will be announced here on the blog Friday, May 8th. One winner will receive the Quickutz Cookie Cutter Celebration set and one winner will receive the Quickutz 4x8 Chick-a-Dee Mini alphabet! Thanks for stoppin' by today! We can't wait to see what you create! We'll see you back here tomorrow for a Slice challenge!

Katie

Monday, April 27, 2009

It's National Scrapbook Day kickoff week!

That's right, I said week! We are going to celebrate all week with challenges from our design team. You will have until Wednesday, May 6th to comeplete and post/email your finished projects. We will choose random winners for each challenge to receive some fabulous prizes. You can participate in one or all of the challenges.

We're kicking off the week with Tammy and Unity Stamps. Here's what Tammy has for you:

Unity Stamp Challenge

Some of you may have noticed that Scrap-Mart has started selling Unity Stamps. I was never a big stamper until I saw them available at Scrap-Mart and decided to give them a try. All I have to say is WOW, these stamps are incredible! I am now a bonafide Unity addict. All Unity Stamps are deeply etched red rubber. They come in both wood mounted rubber stamps (using 1/3 less wood than traditional wood mounts) that can be slid into one of their handles or used by themselves, and unmounted cling foam rubber stamps that can be used with any acrylic block or the Unity Handle. You can see a great video on how these stamps work HERE.

Now onto the first challenge for NSD! Using a Unity Stamp, create a project of your choosing, a layout, card, tag, or altered project. Post your project on your blog or in an online gallery and link it back here. If you don’t have a blog or gallery, email your project to me at tammyc@scrap-mart.com. You can enter as many times as you want to for this challenge, but all projects must be new. Deadline for entries is Wednesday, May 6th. You get one entry per project, 2 page layouts count as one entry. We will choose a winner by random and post on Friday, May 8th. The winner of this challenge will receive some Unity Stamps, and believe me, they are some good ones! I can’t wait to see what everyone creates!

To get us started, Tammy created both a layout and a card. Here's her layout...

She used Unity Beach Days and Sun Rays and she used dimensional adhesive on her stamped images. Tammy's layout was inspired by Chelsea Cook, a design team member for Unity.

On her card, Tammy used Unity's Boom Goes My Heart stamp.

Tammy also used her Spellbinders Rectangle Large Nestabilities and her Cuttlebug Swiss Dots Embossing Folder. That cute ribbon frame is something Tammy got from Patter Cross, another Unity DT member.

I took Tammy up on the challenge and here's my card.

I stamped the Retro Bubble Frame on a piece of white cardstock and colored it with my Copics (R29 Lipstick Red and B24 Sky). Next I layered the white cardstock onto red, blue and a white card base and cut the center out of the image using my exacto knife. Then I stamped my sentiment inside the card so you could read it through the window. Using my Crop-a-dile, I punched out the large holes in teh stamped image leaving the white from inside the card to show through. I found the matching polka dot ribbon in my stash but wanted something more. I didn't have any coordinating red embellishments so I grabbed a clear button and my R29 Copic marker and colored it to match, ran my ribbon through it and viola! I'm sending this card to my aunt who fell and broke an ankle over the weekend. I'm hoping the bright colors will cheer her up a bit.

Okay, now it's your turn! Show us your Unity and remember to link it back to THIS post and/or email it to tammyc@scrap-mart.com. And to sweeten the pot, instead of one winner I'll randomly pick 2 winners! One will receive Unity's Just My Type alphabet and the other will receive Shine On! Have fun and we'll see you back here tomorrow with Challenge #2 from Veronica!

Katie

Friday, April 24, 2009

TGIF!

It's that time again...the end of the week. That also means it's time for another sketch. But, before we get to the new sketch for this week let's take a look at Tammy's layout based on last week's sketch.

She used the Quickutz Banana Split font for her title and the Unity Stamps Owl Journal Box for her journaling. What a pretty layout! That Banana Split font works great for girly pages!

This week's sketch comes our guest designer, Katt Harrington. Check it out...

When I saw this sketch on Paperee I knew I wanted to share it here. Here is Katt's layout she created from her sketch...

What a great layout! And look at that face...isn't he adorable?! I love how Katt made the arrow with the brads! She used her Cricut along with the Cuttin' Up cartridge to cut her title.

And, here's my take on her sketch...

I used my Quickutz 4x8 Moonlight alphabet and my Making Memories Slice Wedding Design Card for my title. The flowers were also cut from the Wedding Design Card. The pink, blue and white patterned paper is Making Memories Shimmer Paper. I LOVE this stuff!

A huge thanks to Katt for allowing us to share her sketch and her layout! Now, let's see what you do with this sketch! You can email your finished project to me at Katie@scrap-mart.com.

I have one last thing to share with you today. I received an email from a reader the other day inquiring about the Quickutz Nesting Stars. Veronica used them on this layout. Veronica put together a picture with a quarter size reference...

There are two different sets of Nesting Stars. The solid star in this set comes with five cookie cutter dies and the star frames in this set includes 3 cookie cutter dies. Now, the frame set will also give you solid cut stars from the center, as seen in the picture, but you will only get 3 sizes instead of 5. Thank you Veronica for helping us out with this.

If you have any questions about any products we carry feel free to email me any time! If I can't answer your question, I'll find someone who can! Thanks for stoppin' by today. Saturday May 2nd is National Scrapbook Day and next Monday begins our National Scrapbook Day Kick Off. We will have DAILY posts next week along with some fun challenges and of course, some PRIZES!! Each day a design team member will issue a challenge. Don't worry, you'll have plenty of time to complete it. Then, on Saturday we'll have more fun and prizes for you! We hope you'll join and feel free to invite your friends...the more the merrier! Have a great weekend and we'll see you right back here Monday!

Katie

Tuesday, April 21, 2009

It's "With us Wednesday" time again...

and I have a great project to share with you from Wendy Camp using the Scrap-Mart Exclusive Flourish.

Wendy also used the Chick-a-Dee alphabet to put her name on her clipboard. She used her favorite colors, pink and black, hoping to keep they guys from walking off with it! Isn't it great?! Wendy, we're so glad you shared your cute clipboard with us!

Our next guest for today is Shar! You won't believe what she did with the new Cookie Cutter Contact Card!!! Check it out...

Shar said "Having the perfect quote up your sleeve isn't always easy, especially when you're doing a card at the last minute. This is a project you can easily add to if you don't have time to organize all your favorite quotes at once. Very handy and fun to make....and a great way to use up scraps too!" She took some of her favorite quotes and printed them all on clear labels, all in different fonts. Using the new Contact Card she cut cards from white cardstock and cut the same amount of cards from scraps of patterned paper then adhered the patterned ones to the front of the white ones and applied the clear labels. She made dividers by adding an index tab from cards cut from colored cardstock so it would be easier to find quotes by category! Here's a few more pics showcasing some of Shar's favorite quotes...

This is such an awesome idea! Thanks Shar for sharing this fun project with us!

The design team is also still playing with their new dies. Veronica created this cute layout...

She used the Cookie Cutter Office Supplies, the Revolution Arrows and the Sticky Note alphabet. The pictures are from a trip to the zoo and the title translates to "petting the goats."

Here's a great "Save the Date" card from Jenn...

She used the Rectangle Nesting Labels, the Reminder and the Sticky Note alphabet. This would make a great title for an appointment board for your home!

Tammy has been waiting forever for a Bracket Border! Here's a layout she created with it...

Tammy also used some of the fabulous Sassafras Lass Bungle Jungle papers and the new Revolution Notebook Sheet. That Notebook Sheet sure makes a great journal spot! Can you imagine the possibilities available for that die?!

I hope you've enjoyed today's projects! We'll be back on Friday with an all new sketch along with a layout from the sketch artist! I promise you'll love it! We're glad you stopped by today and we sure appreciate you! We'll see you right back here Friday! Have a great week...or what's left of it!

Katie

It's Quickutz Release Day...

and we're going "Back to Basics." This month's release is all about the office. Check it out...


Let's start with a quarter size comparison. Here, Jenn has the 2x2 cuts on the left and the Cookie Cutters on the right.

As you can see with the Binder Clip and the Paper Clip, the Cookie Cutter die is larger however, the Push Pin is the same size for both.

And here's a card Jenn made using the Push Pin and Sticky Note from the Office Supplies Cookie Cutter set along with the Sticky Note Alphabet.

Those Sticky Notes would be great for journaling on scrapbook pages too!

Here's another card Jenn created.

For this one, she searched the internet and found a diagram of a soccer field and printed it small enough so that it fits on the Clipboard! How cool is that? Then she used the Sticky Note Alpha again for the sentiment. Jenn has big plans for this clipboard...school pages, sports pages, doctor's checkups and more!

Now look at this cute cute layout from Veronica.

Veronica used her favorite font, Marigold, for her title. Bamse is a cartoon in Sweden and the title says "Bamses World." She also used the Nesting Stars (from March's release) and the new Nesting Circles. Here's a closeup of the title and embellishments.

You could do this with any of the new nesting shapes!

Also, Jenn did a little research for you Silhouette and Gazelle users and found the true type equivalent to the new Sticky Note font is called "Astronaut Jones". We'll be back tomorrow with our regularly scheduled "With us Wednesday" post. And we'll have a few more projects with the new dies too! Leave us a comment and let us know what your favorite new die is from this release! Thanks for stoppin' by! We'll see you tomorrow!

Katie

Monday, April 20, 2009

"It's just another manic Monday"...

I always think of that song when I think of Monday's. So, let's start your Monday off right so hopefully it won't be a "manic Monday."

The first project I have to show you today is this layout from Jenn.

Jenn used the retired Quickutz Chopsticks alphabet for her title and subtitle. Oishi means "delicious" in Japanese. She also used the Tree Border and Revolution Lantern dies and she used her Copic C-3 to add some shading to her lantern.

Jenn also created this adorable card...

She used the Sizzix Dress Up Doll Body and the Medical Profession clothing set. Jenn used the Quickutz Cookie Cutter Basic Phrases set for the sentiment. These dolls have so much potential! As you can see, they make great cards but would also be great on layouts. You could even make your children a set of paper dolls!

This card is a super quick one I made on the way out the door for a birthday party this weekend. I literally had 15 minutes to make this!

I used the Sizzix Hello Kitty with Heart and the Quickutz Scallop Border. Copics were used to shade Hello Kitty's outfit and hairbow. A touch of ribbon and a stamped sentiment and you have a great, quick card any girl would love!

Don't forget that April's Quickutz release is tomorrow! We'll be back with some awesome samples and quarter size references! I hope you have a fabulous Monday and we'll see you back right here tomorrow! Thanks for stoppin' in!

Katie

Friday, April 17, 2009

You know, I totally forgot...

that taxes were due this week! My hubby and I filed quite some time ago so I didn't even think about Wednesday's deadline. With taxes and Easter on everyone's mind this week, there was no sketch participation from last week. No biggie! I have a brand spankin' new sketch for you this week. Check it out...

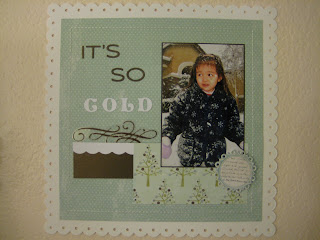
This is a sketch the Oct. '08 issue of Scrapbooks Etc. I really like this sketch! Here's my layout...

I used Making Memories Just Chillin' and Scenic Route Metropolis patterned paper. The title was cut with Quickutz Honey Bee Classic alphabet and the headphones were cut from the Making Memories Slice Just Chillin' Design Card. I cut a piece of American Crafts cardstock into a tag which I used for my journaling. I then tucked it behind my photo with just the ribbon peeking out. A strip of Bead Border finished it off.

And here's Veronica's take on the sketch...

Veronica used some delicious Pink Paislee papers along with the Quickutz Supermarket alphabet for her title. She also used the Pop-up Leaves, Revolution Label and the Bead Border. What a great layout!

I don't have anymore layouts for you today but I do have a video from Jenn showing you a few quick tips on working with the Quickutz Sunburst Border.


Thank you Jenn for those great tips! And thanks to you all for stoppin' by today! I hope you've all had a great week and hopefully the weather is actually a little more Spring-like in your neck of the woods. If you'd like to share your take on this week's sketch you can email me at Katie@scrap-mart.com. We'll be back on Monday with more projects! Have a great weekend and we'll see you then!

Katie

Wednesday, April 15, 2009

First of all, I just want to say WOW!!!

You guys LOVE your Spellbinders! That weekend sale was wildly popular and our Nestabilities are, well, GONE! I can't wait to see what you all create with them!

Today for "With us Wednesday" I'm happy to share a project with you from our friend, Carrie Buss. Carrie created this 2 page layout to document her daughter's growth stages.

Here's a closer view of each individual page...

As you can see, Carrie used a variety of dies on her layout. She started with the Quicutz Limited Edition Sunshine set for her title and the sun. She also used the 2x2 cherries, bird and ladybug. I love how Carrie coordinated the shapes on the layout to her daughter's outfits! Great layout Carrie, thanks for sharing it with us!

Tammy has really been in a cardmaking mood lately. Look at this cute, cute card she created...

Tammy started by embossing her background with the Cuttlebug Swiss Dots Embossing Folder. Then she cut the Boss Kut Little Bird and placed it in the Spellbinders Classic Square and Classic Scallop Square Nestabilities. A few flowers, a pin and a quick sentiment and she's got a great card!

Veronica blew me away with this layout using the new Quickutz Anime release.

I love how she used the Cloud Border as the grass! She also used the Anime Monkey, Revolution Mushrooms and Revolution Trees. For her title, Veronica used the Studio Skinni Mini and Studio Classic (for the Z) fonts and replaced the "o" in Zoo with the Birds.

Our friend PJ recently needed a gift for a family friend who happened to be a teenager and the Just Chillin' Teen Slice Design Card was the first thing that came to her mind. Here's the layout PJ created...

She spoke with the teen's mom to get an idea of a color scheme so that she could make sure it would coordinate with the birthday girl's bedroom. When she completed the layout, she put it in a 12x12 frame. What a wonderful gift!

We're so glad you stopped by today. We'll be back Friday with another inspiring sketch for you. You still have time to get me your projects based on last week's sketch. Email them to me at Katie@scrap-mart.com. We'll see you then! We hope you have a great week!

Edited to add...
Check out this cool video from Terri using
Copics in the Boss Kut Gazelle!


Katie

Monday, April 13, 2009

I hope you all had...

a wonderful Easter weekend! It rained here most of the day Sunday so we spent our day inside.

Easter has passed and Spring is in the air, while it may not seem like it due to the unusually cold temperatures. Veronica has created this pretty card with a Spring feel...

She embossed the background with the Cuttlebug Swiss Dots Embossing Folder. She also used the 2x2 Pop-up Tulip and the Quickutz Oatmeal alphabet for her title which translates to "with a single tulip". That is the beginning of a Swedish birthday song. This card would surely brighten someone's day!

Our friend, PJ, recently took a trip to Hawaii. She created this layout with a hidden tag for journaling.

PJ used the Making Memories Slice Just Chilln' Teen design card for her title and the Noteworthy design card to create the label she journaled on at the bottom of the photo. She likes to use the hidden journaling for private thoughts to keep them out of sight of casual viewers. PJ used ribbon on the top of her tag but you could easily add a tab.

Spellbinders Impressabilities have finally arrived! These things are soooo cool! Here's a quick card I made using my Paisley Impressabilities.

The Impressabilities created my embossed background and I used my Unity Stamps Shine On set for my image and sentiment. If you look closely, you can see where I stamped the image on the white cardstock and paper pieced it with the pink lampshade. The Spellbinders Labels One Nestablities make perfect backgrounds and I used my Spellbinders Petite Circles Nestabilities for my sentiment. You can use the Impressabilities in the Revolution but you will need to cut them out of the frame. You will also need the Spellbinders Tan Embossing Mat and your 12" Revolution Embossing Plate. You layer them like you would a die...Impressabilities first, then cardstock, tan mat then embossing plate. Just be careful that the Impressabilities does not overhang the platform or it will get caught going through the Revolution. You will also need to cut your Spellbinders Tan Embossing Mat so that it fits through the Revolution...but be sure to cut the short side so that you have a long rectangle.

We're so glad you stopped by today! You know, National Scrapbook Day is just a few short weeks away and we're planning some fun things for you! Stay tuned for more details. We'll be back for "With us Wednesday" and we hope you'll join us. If you have a project you'd like to share with us you can email it to me at Katie@scrap-mart.com. See you soon!

Katie

Sunday, April 12, 2009

Happy Easter!

The Scrap-Mart family would like to wish you all a Happy Easter!

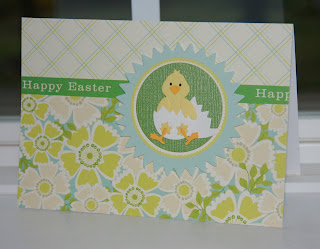
Veronica made this cute little card using the Quickutz 2x2 Chick and Egg die and the New Spring Chick. I know I've seen this chick and egg die a hundred times but it still cracks me up!

And just in case the Easter Bunny forgot to fill your basket, you can hop on over to Scrap-Mart and grab yourself some Easter goodies! Spellbinders Nestabilities are on sale for a whopping $14.99! There's some more great deals but act fast as they won't last forever!

We hope you have a wonderful holiday with your family! Thank you for your continued support! You are appreciated!

Katie

Friday, April 10, 2009

Happy Friday! So, do you have....

any plans for Easter? My family is lying low. We'll have dinner together and do the egg hunt, weather permitting that is. We're supposed to have thunderstorms most of the day. Whatever your plans are I hope you have a wonderful time!

Amanda Havon sent in this layout that was inspired by last week's sketch.

She used her Quickutz Jacqueline and Storybook alphabets for her title and she added a bit with the Scallop Border. I think her daughter's face says it all! Great layout, thanks for playing Amanda!

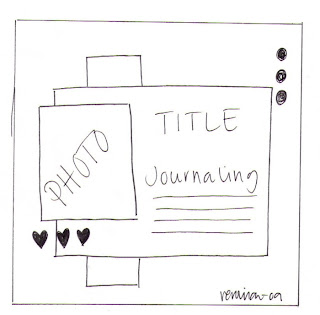
This week's layout sketch is another one of Veronica's!

Our card sketch this week comes from Page Maps.


Tammy created this layout insprired by Veronica's sketch.

Tammy used the Quickutz Rollerskate font and Boss Kut Totally Tall font for her title. She also used the Quickutz Revolution Photo Corner and the Unity Stamps Star of Worn background stamp. The photo is of one of Tammy's best friends practicing her best Hannah Montanna impersonation. Tammy is hoping her friend will still talk to her after this post! LOL!

Veronica created a cute card based on this week's card sketch.

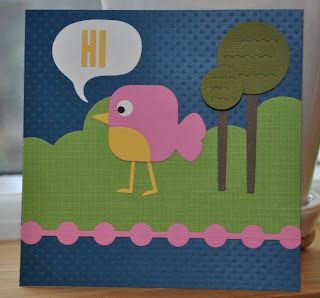
She used the new Quickutz Bird, the Revolution Trees, and the Bead Border. Did you notice the background? Veronica used the Quickutz Cloud Border die to create her ground! How innovative!

Jenn also created a card from this week's sketch.

Jenn used the Quickutz 2x2 Cracked Egg Club Die, 2x2 Egg with Feet Die and the older 2x2 Chick die. The patterned papers and pinked circle are from Scenic Route's Lynden collection. I just love that cracked egg!

And here's my layout based on Veronica's sketch.

The title is a mix of the Quickutz Moonlight font and Making Memories Slice Wedding Design Card. The photo corners were cut using my Making Memories Noteworthy Design Card. I had some old big brads that didn't match my layout so I covered them with some American Crafts Zing Glitter Embossing Powder and heat embossed it so the glitter wouldn't flake off.

Thanks for stopping by today! We hope you've found some inspiration! We'll actually be back on Sunday with a special Easter post for you! If you participate in this week's sketch challenge, you can email your finished projects to Katie@scrap-mart.com. We'll see you soon!

Katie